
But the
first time I got to his place I forgot to buy batteries for my camera, so no
battlereport from that game. Just a few words – I faced Daemon and his
Tau/Eldar list with Ethereal powered firewarriors, Shadowsun powered
battlesuits and new awesome Skyray gunships:) I managed to pull a narrow draw
9-11 in favor of Tau, nevertheless it was an uphill battle for me.
The second
time I came to Paul’s place and faced Paul’s Tau/Eldar list (by memory):
Commander
Farsight
Shadowsun +
Farsight bodyguards (2 with meltas, 2 with rockets, 2 with plasma, 1 with
systems)+ 7 markerdrones
Farseer on
jetbike with runes
Riptide
Riptide
10 kroot
10 kroot
3 eldar jetbikes
Skyray
Skyray
So, all
instruments to kick my ass is in:) Let’s look at my list too:
HQ1: Hive
Tyrant, TL Devourers (x2); Wings; Leech Essence; Paroxism; Old Adversary [285]
HQ2: Hive
Tyrant, TL Devourers (x2); Wings; Leech Essence; Paroxism [260] - Warlord
ELITE1: 2
Hive Guard Brood [100]
ELITE2: 2
Hive Guard Brood [100]
ELITE3: 2
Hive Guard Brood [100]
TROOPS1:
Tervigon, Adrenal Glands; Toxin Sacs; Catalyst; Onslaught [210]
TROOPS2:
Tervigon, Toxin Sacs; Catalyst [185]
TROOPS3: 13
Termagant Brood, 13xDevourers [130] in Transport1
TROOPS4: 13
Termagant Brood, 13xDevourers [130] in Transport2
TROOPS5: 13
Termagant Brood, 13xDevourers [130] in Transport3
TRANSPORT1:
Mycetic Spore, Twin Deathspitter [50]
TRANSPORT2:
Mycetic Spore, Twin Deathspitter [50]
TRANSPORT3:
Mycetic Spore, Twin Deathspitter [50]
FORTIFICATION:
Aegis defence lines, Comms Relay [70]
We play
ETC-2013 missions and roll mission number 5.
THE
SCOURING - Each player places three markers 6 "from the edge, 12"
from each other worth 1, 2 and 3 points (point values noted in secret by the
player deploying them). Then before rolling to take the initiative you need to
give your opponent the value of individual markers
DEPLOYMENT
- VANGUARD STRIKE
So, my
opponent can easily outshoot me, but he is short on troops, so I can try to
kill him all his scoring! :)
Paul won
the roll to choose side, but it’s not important on this table. I place Aegis
close to my short board edge! And my markers in my corner, while Paul places
his markers in his corner.

Warlord
traits:
Shadowsun –
3d6 jump.
Tyrant –
minus 1 to opponent’s reserves (that’s baaad)
Powers:
Farseer get
primaris of divination.
Tyrant-warlord:
Endurance, Life leech
Flyrant:
Iron Arm, Warp Speed
Tervigon:
Endurance, Objuration mechanicum, Telekine dome
Tervigon 2:
Catalyst, Dominion
No
nightfight for the first turn.
I win the
roll to go first and choose to go second:)
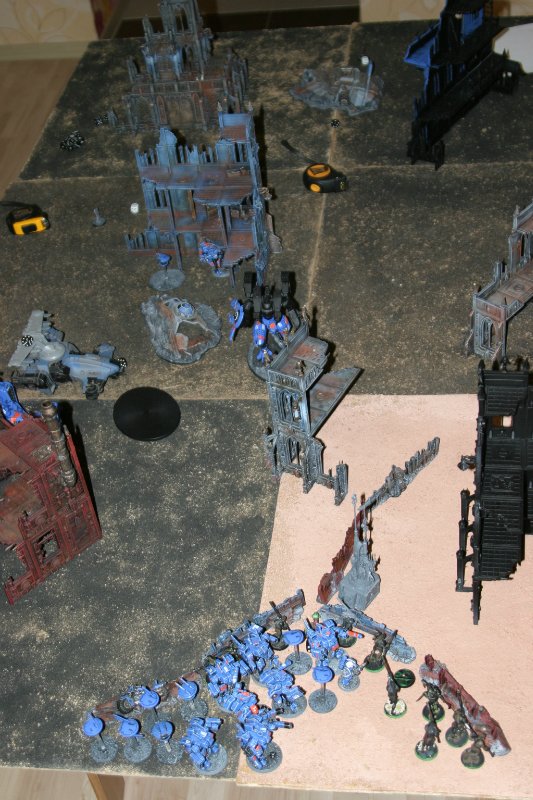
Deployment.
2 riptides,
2 gunships and a sweet couple (Farsight with Farseer) are on the board. 1 kroot
pack and bikes are in reserve, 1 kroot pack outflanks.
I place 6
hiveguards behind the Aegis and 37 inches away from opponent. Warlord is in
reserve, Flyrant deepstrikes, 3 spores deepstrike and 2 tervigons in reserve
too.

Shadowsun
joins the bodyguards and infiltrates 18 inches away from my hiveguards.

I decide to
try to seize, cause Paul placed suits closer to hiveguards than drones! I can
kill 2 melta and 1 plasma bodyguard with hivegards salvo in average! But I
failed to seize and Paul starts:)
Turn 1:
Tau/Eldar
Everything
come closer to my lines!
Paul want to win on turn 1 and divide his
shooting.

Meltas kill
one squad right away. Rockets fail to take out the last wound from second squad
and gunships kill only one hiveguard from the last squad after drones lighted
them up with markers. One hiveguard fails morale and run, second hiveguard
stays put.
Everything
come even closer!

Turn 1.
Tyranids
One
hiveguard run away from table, while second passes Instincts and try to do a
little shooting at gunship. 2 hits and 1 glance – a nice try;)
Turn 2. Tau/Eldar
Riptides
turn on their reactors to double missile shots. One of them get rerolls from
Farseer.
Kroots come
in from my short board edge and take their position behind my Aegis!
The last
hiveguard torn apart with Shadowsun unit shooting. Bodyguards jump to hide
behind my Aegis, near comms relay:)
Feel that?
The trap is closed! The enemy base is clear!!! Enemy boeing is far away from Tau
base! Coward hivemind:)
Turn 2.
Tyranids
I get
Flyrant, 2 spores and a 3-power tervigon in. I try to drop Flyrant to the
corner but scatter 12 inches towards my opponent! Hmm. Okay, let’s do it more aggressively
then!
I drop
first spore right at the gunship’s back! Gants line up to shoot at farseer.
Second
spore scatters 12 inches!!! Again… and drop near first one. Gants line up in
the same fashion.

Tervigon
come in on the right.

Riptides
intercept and wipe out one gaunt squad right away!
Shooting.
Flyrant see only Farsight and kill him out. Gants bring down Farseer (every
tyranid player smiled at this point, right? The death of Farseer is like a
blessing for tyranids).
Spores do
nothing to gunships.

Turn 3.
Tau/Eldar
Both troops
unit come in. Kroots in the center,


Not much
shooting at flyrant, but he is grounded by skyray from the first hit and lose a
wound. All other shooting murder gunts and spores.

Turn 3.
Tyranids
I get only
my warlord in. I put him far from enemy on the right. I Endurance and Iron Arm
my Flyrant.
Tervigon
spawns 16 gants with double. Gants run towards the opponent’s 3-point
objective.
Flyrant fly
closer to the kroots in the middle.

Shooting.
Only 2 kroots left after tyrant’s shooting. But the pass morale.
Flyrant
regenerates lost wound.
Turn 4.
Tau/Eldar
Everything comes
closer to the center, but riptides keep away from my buffed Flyrant.
Shooting. Bodyguards
and riptides open up at tervigon and kill him right away. Gunships try to deal
with flyrant but only manage to do 1 wound (one gunship has run out of rockets
after this).
Assault.
Enemy jumps back in order to hold markers behind the Aegis and protect kroots.

Turn 4.
Tyranids
Tervigon
and gants come in.
I drop
spore on the 3-poin marker and hide them in the ruin. Warlord sit close in
there.
Flyrant fly
away from table.
Tervigon
FnP itself. Warlord Endurance itself.

Turn 5.
Tau/Eldar
Kroots
spread on a 2-point marker.
Everything
lines up and shoot down my second tervigon. That hurts!


Turn 5.
Tyranids
My flyrant
vector strikes the bikers on the marker and kill em all! Then shoot kroots and
kill 4. They fail Ld 6 test and run from the 2-point marker.

I spread my
gants and hold 3 and 2 point markers.
1d6=2. The
game ends!!!
I score 5
points of markers, while Tau/Eldar score none. Both warlords are alive. Both
players get linebreaker:) Tau/Eldar have First Blood, so the resulting score is
6-2 on mission.
The
difference in losses is 675 points, that is +-1 point on the ETC scale in favor
of Tau/Eldar.
The final
score is 11-9 in favor of Tyranids:)
So, Tau has
a lot of powerful guns, but their troops are fragile. Maybe it’s better to take
allies with powerful troops for Tau? Like Orcs? Tau/Orcs sounds great:)
Cool game boys )))
ReplyDelete